2-Minute Quick Setup Video
Make sure you have allowed the following URLs under options before you use the software:
- https://frzserver.com
- https://faireconomy.media
Installation Guide
NB: This is for MT4 but similar approach is used in MT5 too.
For quick setup, just use one indicator with buy and sell signals with our entry optimization which is enabled by default. Having tested thousands of indicators for years, we have noticed that this is the best way of creating a successful automated system. Whatever your current strategy is, we recommend you to first try this way which could increase your chances of making a successful automated system.
Video guide on this quick setup (based on older version):
https://www.youtube.com/watch?v=tq6Jxxznf04
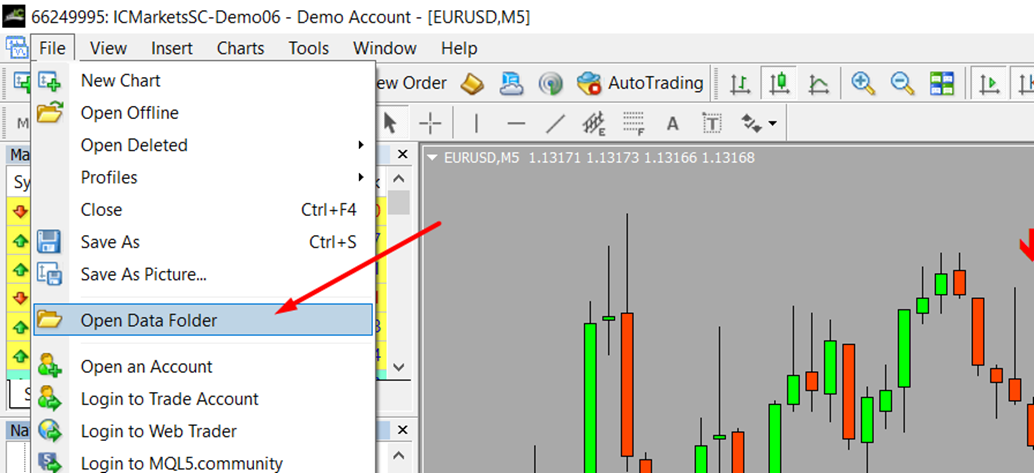
Step 1
Go to file, Open Data Folder => MQL => Experts folder. Then place the Indicator Automater EA (.ex4 file) under your MT4’s Experts folder
Step 2
Add your primary indicator name exactly as the indicator file name (without .ex4) under Setting 1.

If your indicator is located within a sub folder in the Indicators folder, please add the folder path correctly. E.g. if your indicator is located inside Market folder then it should be “Market/Super Arrow Indicator
Step 3
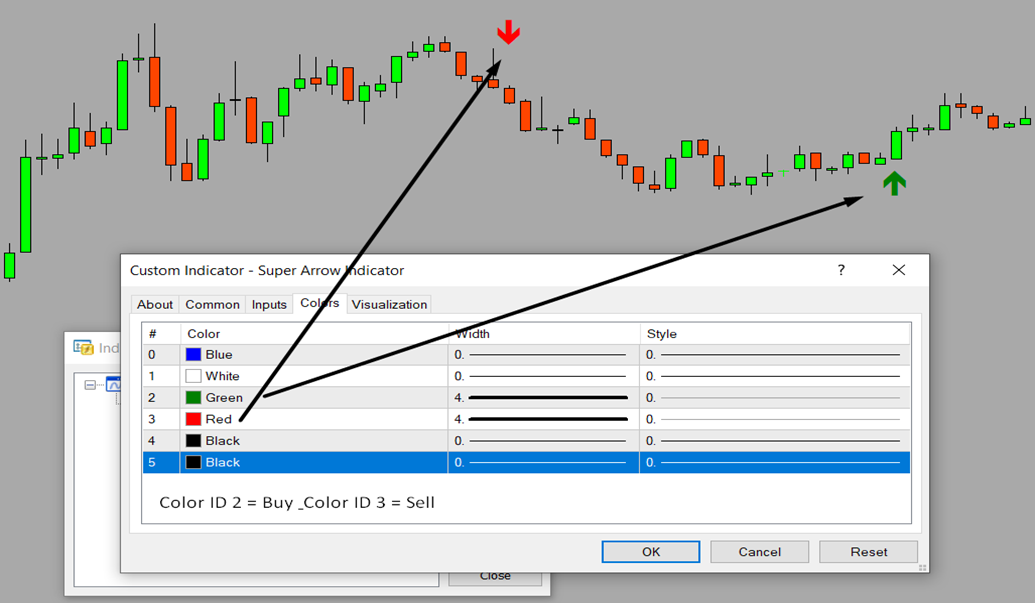
Identify your indicator’s buy and sell buffer/color numbers from your indicator as given in the below example.
NB: We are considering a buffer based indicator here; if your indicator is based on objects rather than buffer/color numbers, you need to adjust object based settings as necessary. Please read those setting descriptions and setup accordingly.
Step 4
Now simply enter the previously identified buffer/color numbers for buy and sell under setting 6 & 7 respectively as given in the following example.

That’s simply it! Just leave all other settings as defaults for now. You now can use these settings to run back tests on strategy tester or live test with a DEMO account.
Using Set Files
We have given some set files that can be used if you are trading any of the given common trading styles.
Please note that set files are not customized to your indicator but they provide background settings for each given trading style. You need to add your indicator buffers/object details after loading the desired set file. We recommend you try set file 5 first and compare the results with your own custom setups before deciding on the one to be used.
Some set files use ATR based stop loss which you may disable under settings and some set files use lot size as a % of balance; you may change the settings fixed lot size if necessary.
Set file 1=> One Trade per Signal with TP & SL
This is the classic method, whenever your indicator/s gives a signal, the Automater will open a trade with TP & SL that are set based on ATR. There will be only one trade per signal. However, you need to have an indicator/s with a good win rate to be profitable on this strategy.
Set file 2=> One Trade per Signal with TP & SL + Martingale
This is the same as the first set file but with martingale. You will double the lot size each time you get a losing trade.
Set file 3=> One Trade per Signal with TP & SL + Hedging
This is also an extension to the first set file; In this case, the Automater will open trades on both sides whenever the respective signals appear. So, there can up to 2 trades at any given time. For instance, if there is a buy signal, Automater will open a buy trade and then while the buy
trade is going on, the Automater may open a sell trade if a sell signal appears. Make sure your broker allows hedging before you use this strategy. Here also you need to have an indicator/s with a good win rate to be profitable on this strategy.
Set file 4=> Signal to Signal Trading
In this case, we enter a trade when a signal appears based on your indicator/s and we only close the trade on opposite signal and then open a new trade on the new direction. So there is no take profit or stop loss here. There will be only one trade per signal. The lot size is fixed in this case at 0.01, which you may change. However, you need to have an indicator/s with a good win rate to be profitable on this strategy.
Set file 5=> Entry Optimizing (DCA) Based on SL
In this case, when the price goes against us we open additional trades based on the stop loss distance set under our SL settings. Therefore, the trades are not closed by stop loss and there can be more than one trade at a given time and the TP will be adjusted every time an additional trade is entered based on the average price in line with DCA (Dollar Cost Averaging) method.
Set file 6=> Default – Entry Optimizing (DCA) Based on Opposite Signals
This is the default; even if you do not use any set file, Automater has these background settings. In this case, when the price goes against us we open additional trades whenever a new signal in the same direction is provided by your indicator/s rather than the stop loss in the previous method. Therefore, the trades are not closed by stop loss and there can be more than one trade at a given time and the TP will be adjusted every time an additional trade is entered based on the average price in line with DCA (Dollar Cost Averaging) method. This is the recommended method to test before you try any other custom settings.
Types of Indicators Supported
Supported Primary Indicators
Automater supports any indicator that has some kind of buy and sell signals. These signals can be from the indicator buffers or indicator created objects on the chart. It is not necessary to have the source code of the indicator and it does not matter if the indicator repaints or not.
Buffer based indicators are the indicators whose buy and sell colors can be changed via indicator’s colors tab under settings. On the other hand object based indicators signals can not be controlled via its colors tab but the signals are objects created on chart.
NB: For buffer based indicators, Automater takes only default settings of your indicator if you have only ex4 file (You can only change the default settings if you have the source code). However, you can use any settings for object based indicators.
Given below are the types of indicators that can be automated.
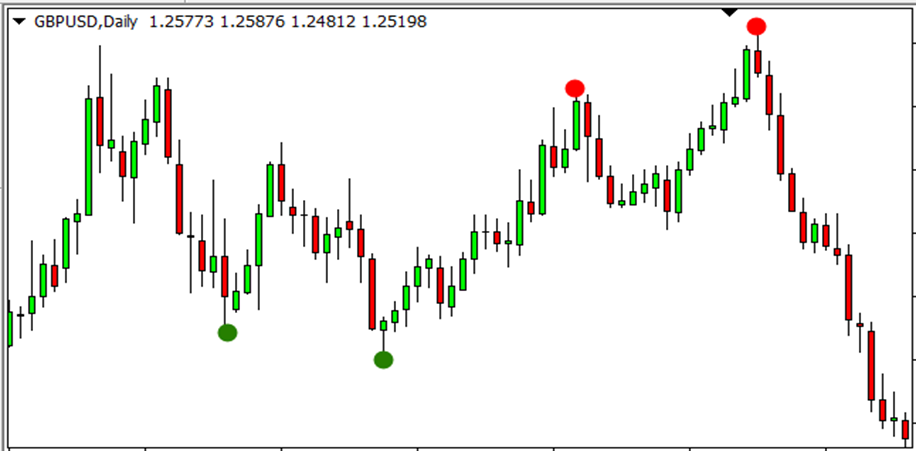
Type 1 – Indicators generating arrows or similar signs such as thumb up/down, dots, etc. for buying and selling.
Examples:


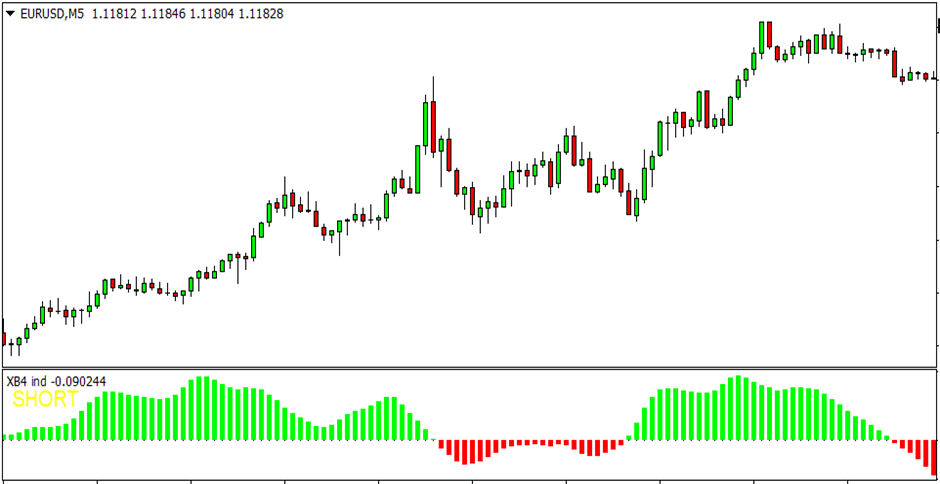
Signals can be from a sub window as well

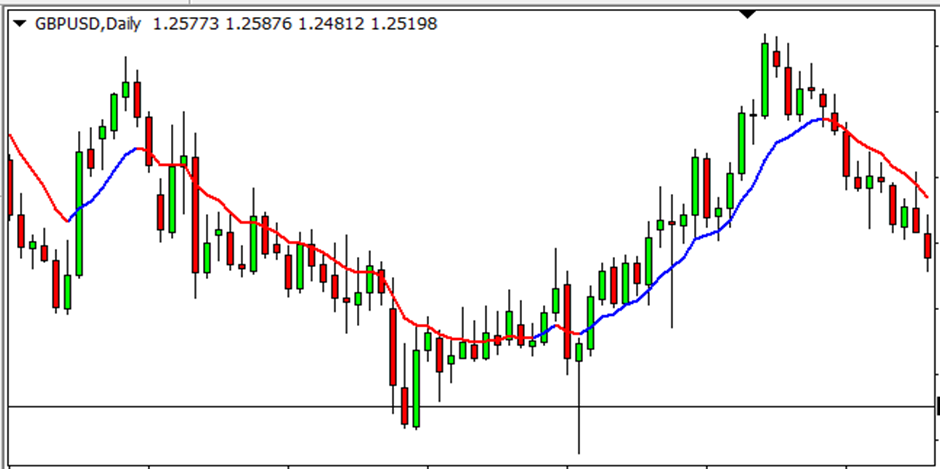
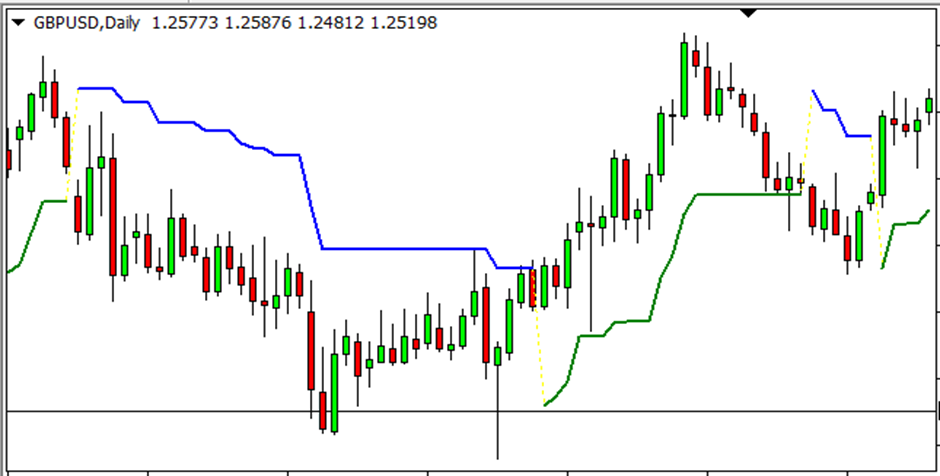
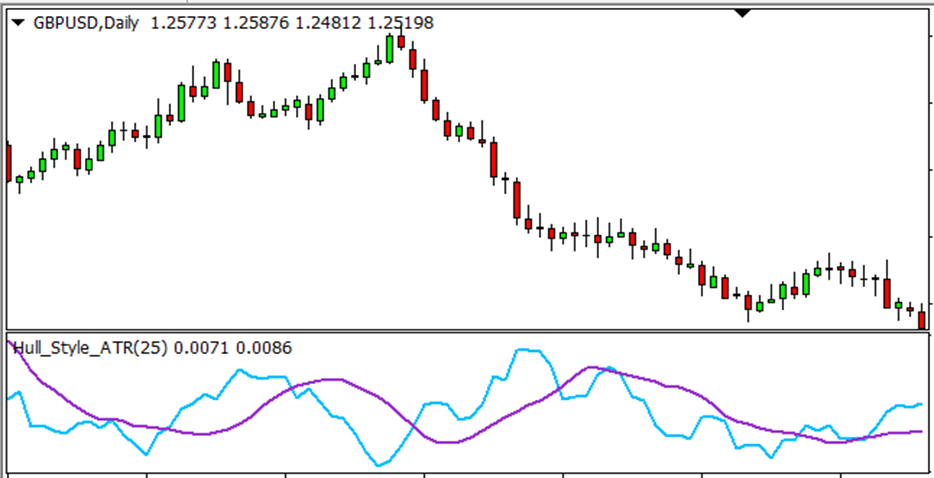
Type 2 – Indicators with one line that change colors as per up or downtrend.
Examples:
Signals can be from a sub window as well

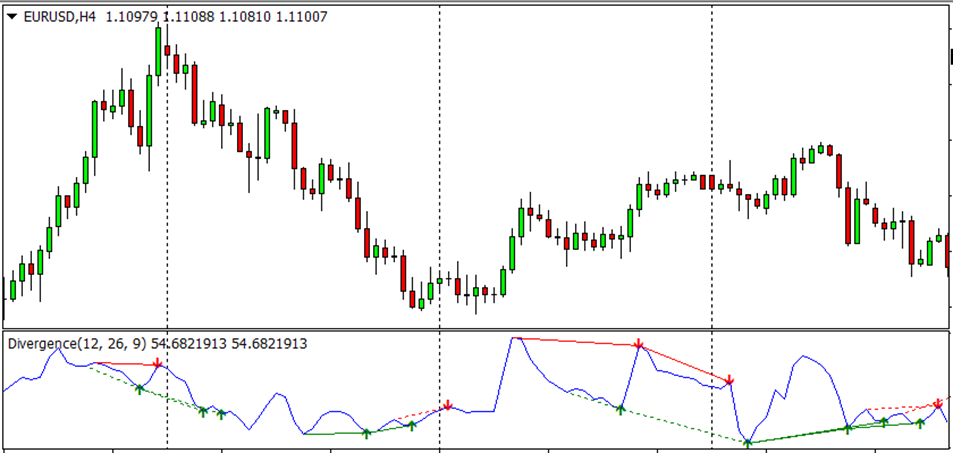
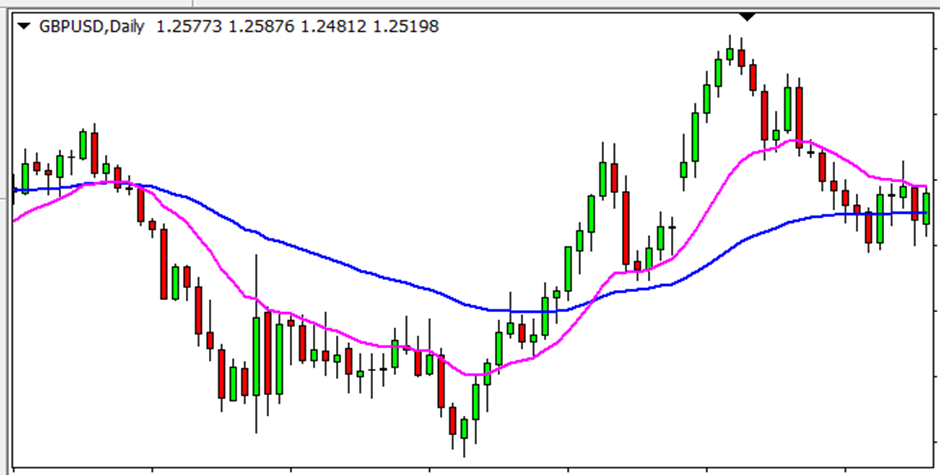
Type 3 – Indicators with two lines where buy or sell is determined by the cross over.
Examples:

Signals can be from a sub window as well

Type 4 – Indicators with object based indicators.
This EA will work with almost any object that has a time parameter under properties and also has a common prefix for buy and sell in the object name with different colors for buy & sell objects, or else distinguishable text for buy and sell objects respectively. You can learn more about object based indicators here.
Examples:
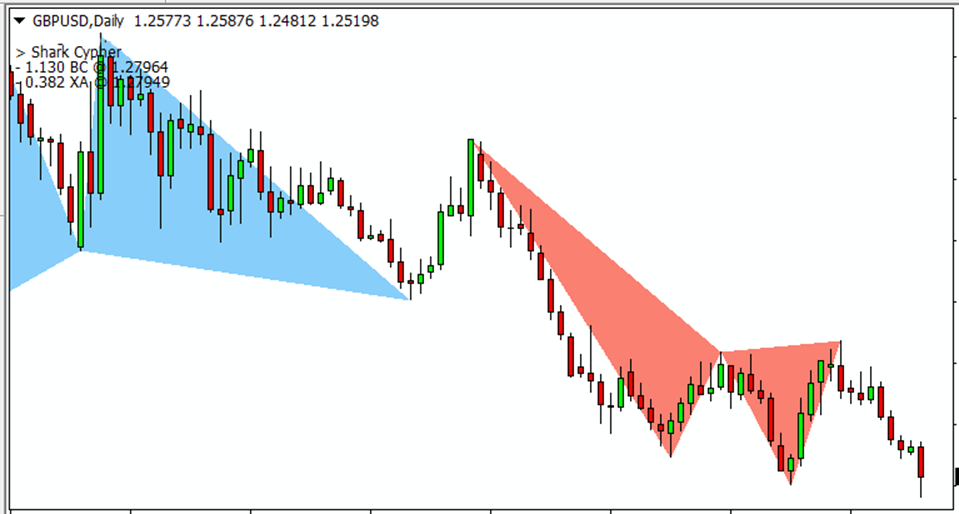
Objects can be on a sub window as well
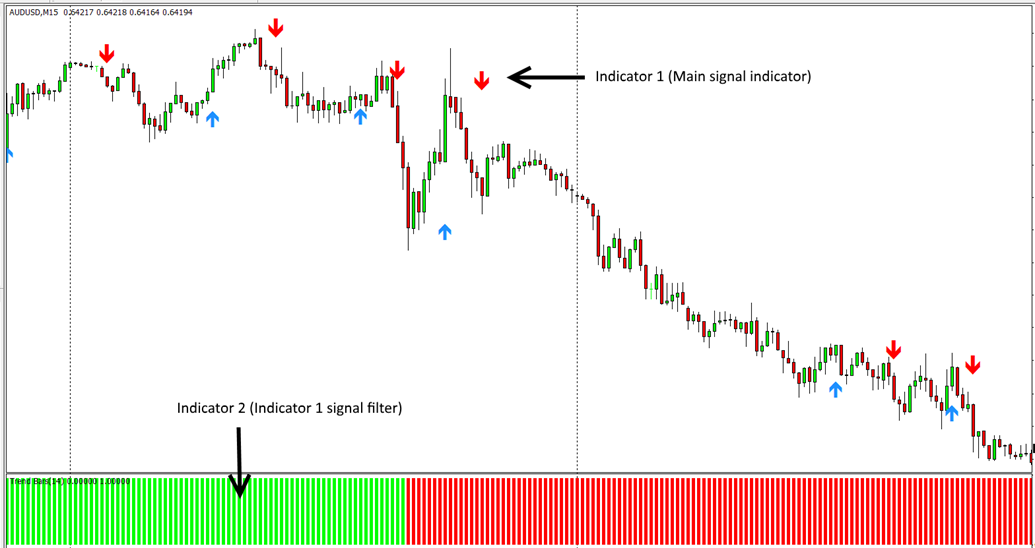
Supported Filtering Indicators – Filter 1 (Second Filter)
You can use any buffer based indicator as the second filtering indicator, preferably one that provides continuous signals that is always present; thus an arrow based indicator may not be suitable for this. You can learn more about the second filter indicator here.
Example for a second filtering indicator:
Supported 3rd Filtering Indicators
You can further filter your first indicator signals by a third indicator. Unlike the second indicator that uses buffer color ID, this third indicator filter uses the values of the buffer/color IDs. For instance, you can use stochastic indicator as third indicator and set a rule to buy only when signal line is below 30 or you can use RSI indicator to buy when RSI is above 50.
Supported Exit Indicators
You can optionally use any type 1 buffer based indicator to exit trades.
Caution on Repainting Indicators:
The EA may make trades/orders as the indicator buffer or object appears. So if your indicator repaints, you might see trades/orders made while no indicator buffer or object visible or buffer or object is painted at a different place. You may increase the candle ID to look at under Settings (for buffer based indicators) or object older than setting (for object based indicators) to delay the entry to see if the signal repaints.
Types of Indicators Supported
Indicator buffers (or color IDs) are given under the colors tab of indicators. Buffers generally have numbers and corresponding colors. These colors represent some kind of drawing on the chart which can be an arrow signal, trend line, or similar sign.
If your indicator has indicator buffers that signal when to buy and sell, then you can use this option. You just need to enter your indicator name & map the right buffer numbers to buy and sell signals. Our EA will access the indicator in the background and there is no need for the indicator to be running on the chart.
NB: When you use buffers or color IDs, the EA will only consider the default settings of the indicator. You can only change the default settings if you have the source file in mq4 format (You need to open the .mq4 source file on MQL editor and change the default settings to what you need and save the file).
NB: The EA may not work with some default MT4 indicators for buffer based automations (this is because MT4 may not show the indicator files for some of the default indicators) but any indicator would work for object based automations as EA will simply read the object on the chart. However, you can find custom indicator files for the same MT4 indicators on the internet and then use with the Automater.
There are 03 types of indicators you can automate with buffers/color IDs:
Type 1 – Indicators generating arrows or similar signs such as thumb up/down, dots, etc. for buying and selling.
Examples for Type 1:
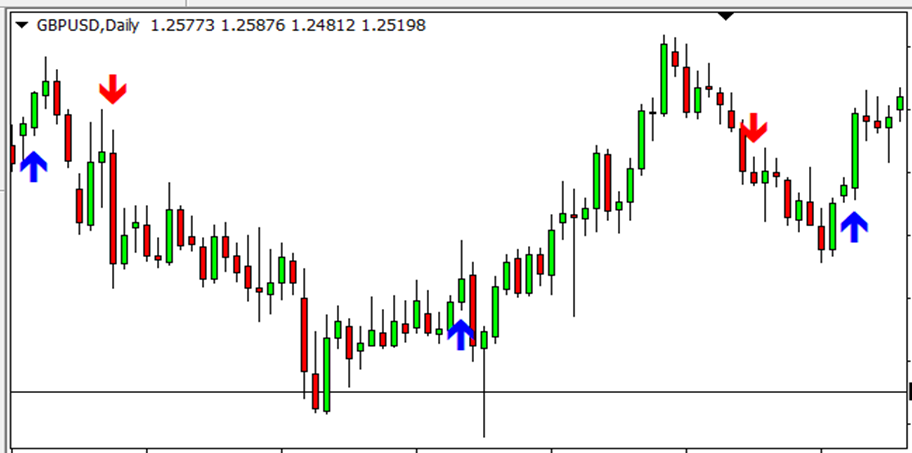
The signals can be on a sub-window as well.
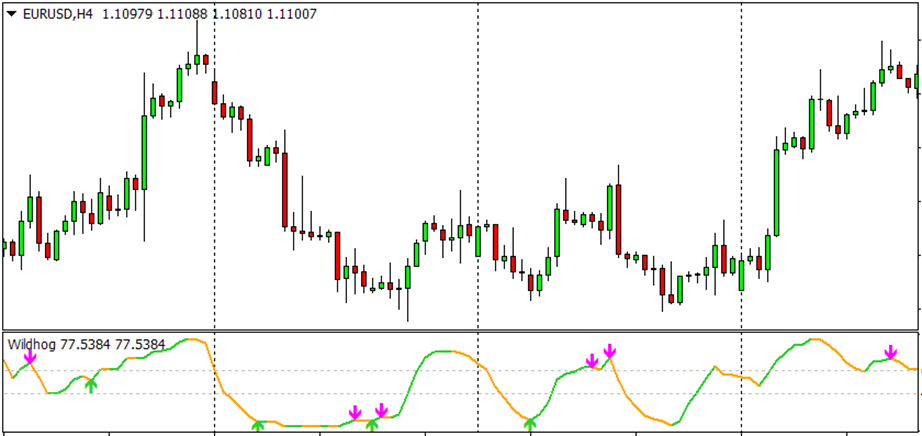
Type 2 – Indicators with one line that change colors as per up or downtrend.
Examples for Type 2:


The indicator may also be in a sub-window as follows:
Type 3 – Indicators with two lines where buy or sell is determined by the cross over.
Examples for Type 3:
The indicator may also be in a sub-window as follows:
Type 4 – Object based Indicators
This is the Type 4 of indicators that can be automated. These indicators generate objects on the chart as their buy or sell signals. This EA will work with almost any object that:
- has a time parameter under properties
- has a common prefix for buy and sell in the object name with different colors for buy & sell objects, or else distinguishable text for buy and sell objects respectively.
Please read the details under the respective settings for more details on using objects.
Example of objects created on the chart by an indicator:

Objects can be on a sub-window too

The objects can include arrows, triangles, buttons, dots, etc. You can use these objects to make trades/orders with this EA. The objects are captured based on their name, color, and time of creation.
NB: It is not necessary to add the indicator name under the Setting 1 if you are using indicator objects. Further, you can change your indicator settings without any limitation because the EA is only reading the objects available on the chart. Therefore, you MUST have the indicator running on the chart.
Does your indicator have buffer/color IDs or object-based signals?
Buffer based Indicators
If it is a buffer-based signal, you should be able to change the colors of the signal on the chart (up/down arrow, lines, etc.) by changing the colors from the colors tab of your indicator settings as given below.
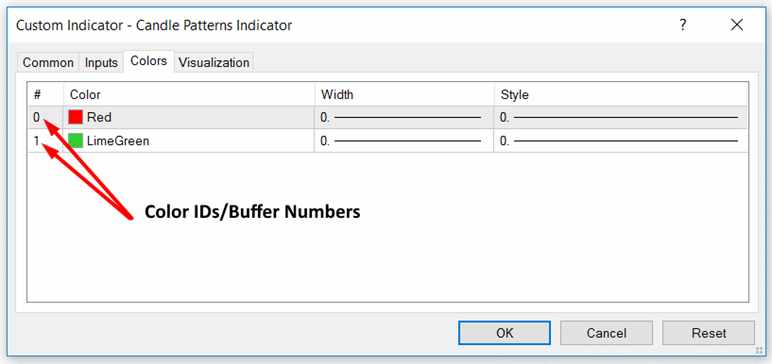
You can simply change the colors and see if the colors on the chart change accordingly. If it does change, then it is a buffer or color ID-based signal. You need to identify the color IDs for buy and sell signals. If your signals are not buffer based, the alternative is to see if the signals generated by the indicator are objects created by the indicator on the chart.
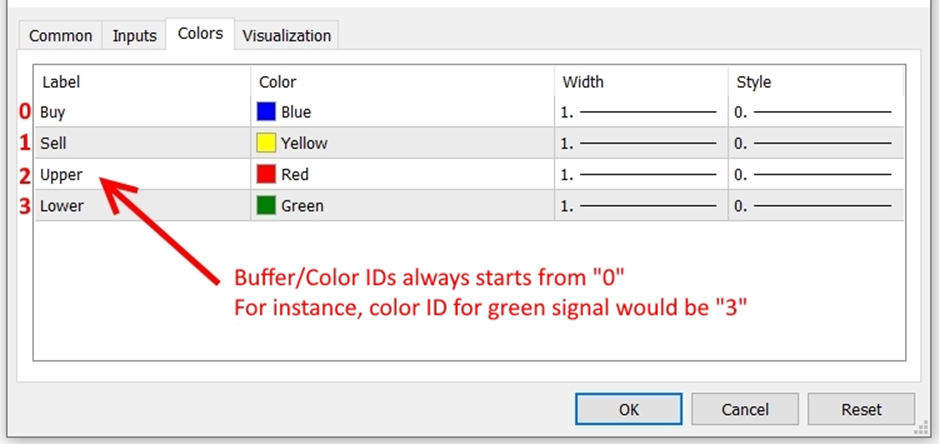
On MT5 indicators, you might not see the buffer numbers explicitly; but buffer numbers always start with zero. can decide the buffer number accordingly.
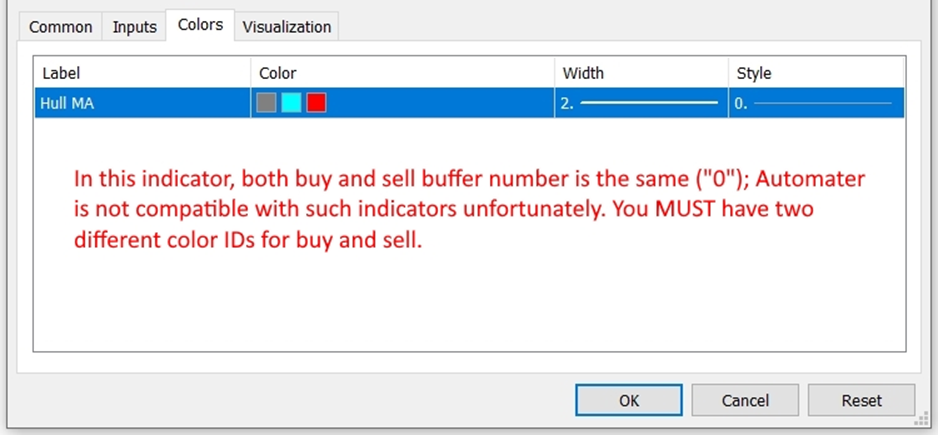
In some indicators, you may notice that two or more buffer/color IDs are used in a single line as given below. Unfortunately you cannot use the Automater for the same color ID with different colors. You must have two different color IDs for buy and sell.
Object-based Indicators
To check if the indicator signals are based on objects, just right click on any part on the chart and see if there is an item called “Objects List” as given below (this item will appear only if there are objects on the chart):

If the arrow, sign or any other pattern generated on the chart are objects you can identify this as opposed to the buffers or colors IDs, then you are going to trade based on these indicator created objects.
Please read the section “Automation based on Objects Created by the Indicator” to see if your indicator-created objects can be automated by our Automater.
Caution on Repainting Indicators:
The EA may make trades/orders as the indicator buffer or object appears. So if your indicator repaints, you might see trades/orders made while no indicator buffer or object visible or buffer or object is painted at a different place. You may increase the candle ID to look at under Settings (for buffer based indicators) or object older than setting (for object based indicators) to delay the entry to see if the signal repaints.