FRZ Crypto Automater MT4 is an MT4 expert adviser (EA) tool that can automate indicator based trading strategies on crypto exchanges (currently Binance). It is done by coping the trades entered by MT4 platform to Binance trading platform via its API access. The EA can be used to trade on Binance Spot or Futures market based on signals from one or more MT4 indicators along with many other filters you can use to improve the accuracy of your strategy. The good thing is you can back test your strategy on MT4 before you deploy them on Binance.
Supported Pairs: Any MT4 crypto pair that has a corresponding pair on Binance
Note on the risks on price differences on MT4 & Binance: The EA will enter trades on Binance based on your MT4 broker’s chart prices; however, the prices on Binance (especially Futures) may be different from your MT4 broker’s prices. This difference can be significant if you trade on small timeframes (like M1 & M5) or with too small take profit and stop loss levels. Therefore it is better to have an MT4 broker that has minimum price differences from Binance; we can recommended ICMarkets as a broker but still price differences are unavoidable.
Key features:
- Trade based on indicator buffer signals or objects
- Filter signal indicator with a second indicator
- Optional exit indicator
- Additional entry filters: MA line filter & choppy market filter
- Optional Martingale
- News Filter
- Dollar Cost Averaging (DCA) with 2 entry types
Backtesting on MT4 for Binance
Automater supports entries on Binance with or without take profit/stop loss, which is implemented using stop/limit orders on Binance. Trailing stop, breakeven and other similar features are not currently supported. Please also note that adding new trades on MT4 is reflected on Binance futures as adding to the current position with an average price. However, you will notice that we use an optional lot ratio (Setting 6) to adjust the lot size on Binance from MT4 lot size. If you are using a lot ratio other than 1, then you need to consider this difference while back testing, otherwise your back testing on MT4 will not be reflective of what you could achieve on Binance.
Recommend back testing procedure on MT4:
- Register a demo account at your broker on the same leverage that you get on Binance futures. If you are using spot market, then open the DEMO account with no leverage (1:1).
- Set a testing balance which is equal to your Binance balance available for trading divided by your intended Binance lot ratio (Setting 6). Example: You have USDT 500 on Binance and you intend to use a lot ratio of 0.1 under Setting 26. Then divide 500 by 0.1, which equals to 5,000. Thus, the testing balance has to be 5,000. So that your back testing results would be reflective of what you could expect on Binance when you connect to Binance with 0.1 Binance lot ratio. (However, please bear in mind that past performance of any system is not necessarily reflective of future results).
- Now, do the back testing on the MT4 crypto pair for at least 2-3 years on every tick model. Please note that actual prices on Binance can be somewhat different from MT4 (Spot price differences would be less but futures price differences could be considerable if you use short time frames like M1 & M5 or use too small take profit or stop loss). Consider the back testing results along with the drawdown; if you are not satisfied with the results, make necessary changes under the EA settings and do further testing. Automater has a lot of features that you can use to increase the accuracy of your primary signal indicator such as filtering indicator, choppy market filter, MA filter, news filter and so on.
- Connect to your Binance account only after you are fully satisfied with the backtesting results as to the optimal lot size, return and potential drawdown.
Operational Differences on Binance from MT4
Closing trades on MT4
Closing an opened spot trade on MT4 is equivalent to an opposite trade on Binance. For instance if you close a BTCUSD trade on MT4, the equivalent action on Binance would be a sell trade on BTCUSDT with the same volume.
Stop loss and take profit on Binance
Take profit and stop loss on MT4 will also be equivalent to opposite trades on spot Binance. For instance, if you buy BTCUSD 01 lot on MT4 at $50,000 spot rate and place stop loss at 40,000 and take profit at 60,000, the EA will open a corresponding BTCUSDT buy trade at Binance at the spot rate that existed at that time. If the price reached $60,000, MT4 would close the trade while on Binance a sell trade will be triggered with the same volume as the buy trade. Similarly, if the price dipped to $40,000, MT4 will execute the stop loss and close the trade while on Binance a BTCUSDT sell trade will be triggered with the same volume as the buy trade.
Adding more positions to the same pair on Futures
When you add additional positions on the same pair, Binance will only add to the current position with an average price where as you will get different trades on MT4.
NB: Functions like breakeven, trailing stop and other advanced functions are not yet supported on Automater.
Quick Setup
Step 1
Go to your Binance account. Move the cursor to your profile icon and from the drop down list, select “API Management”. Then create an API with an API key and a Secret key. We will need to enter these two keys under EA Setting 3 & 4 later.
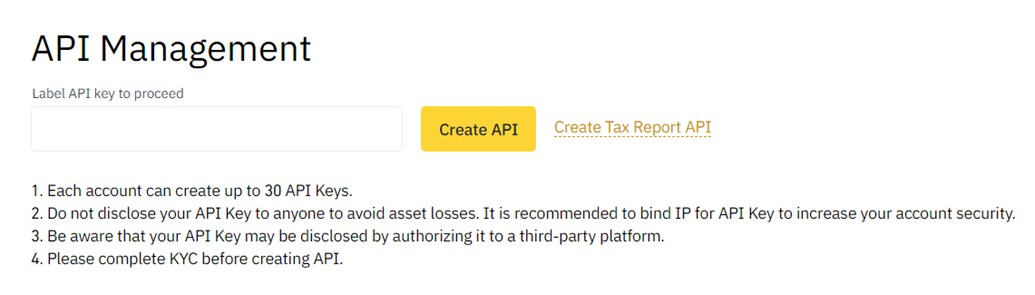
Also you need to enable Spot & Margin trading and Futures trading.

NB: you may have to create the API before you make the futures account in order to enable futures trading via API.
Step 2
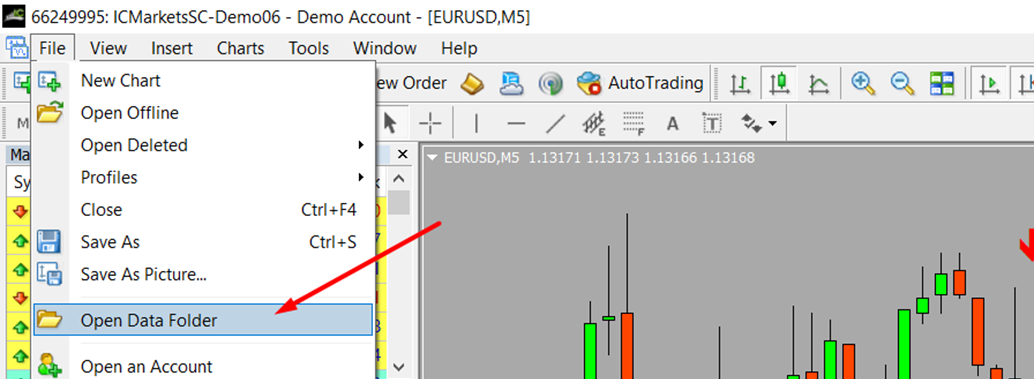
Go to file, Open Data Folder => MQL => Experts folder. Then place the FRZ Crypto Automater EA (.ex4 file) under your MT4’s Experts folder.
Step 3
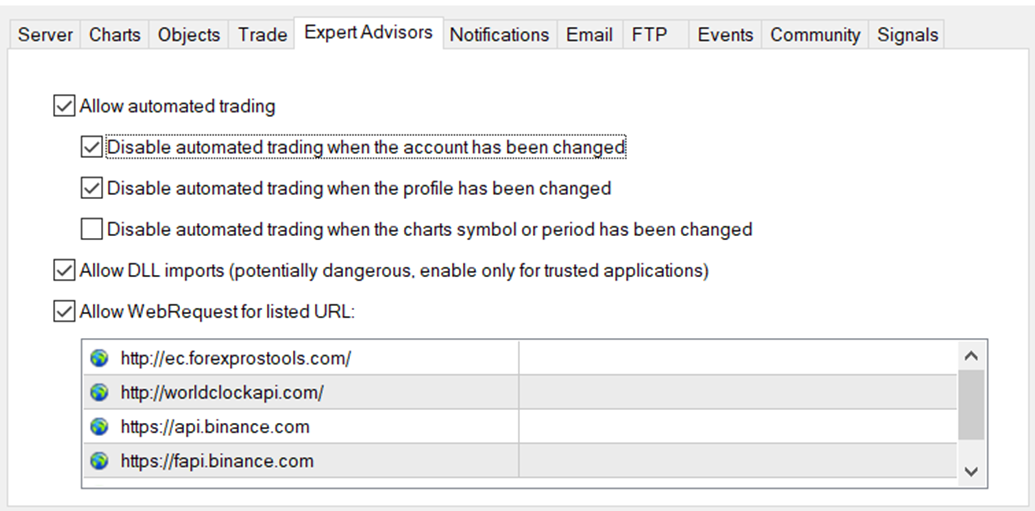
Go to MT4 => Options=>Expert Advisers and allow automated trading, DLL imports, and Web Requests and add following URLs to allowed URLs.
- https://api.binance.com
- https://fapi.binance.com
NB: The news filter will not work without these allowed URLS. Given below is a screenshot of what you need to do.
Step 4
As an example, let’s assume we are setting up the Automater for an indicator called “Super Arrow Indicator” which is a buffer based indicator. First, we need to identify the buffer IDs for buy and sell. (If your indicator is based on objects rather than buffers, you need to adjust Setting Nos 15-25 as necessary. Please read those setting descriptions and setup accordingly).
Now load the indicator on the desired crypto chart of your MT4; let’s identify the indicator’s buy and sell buffer/color ID numbers from the indicator as given in the below example.
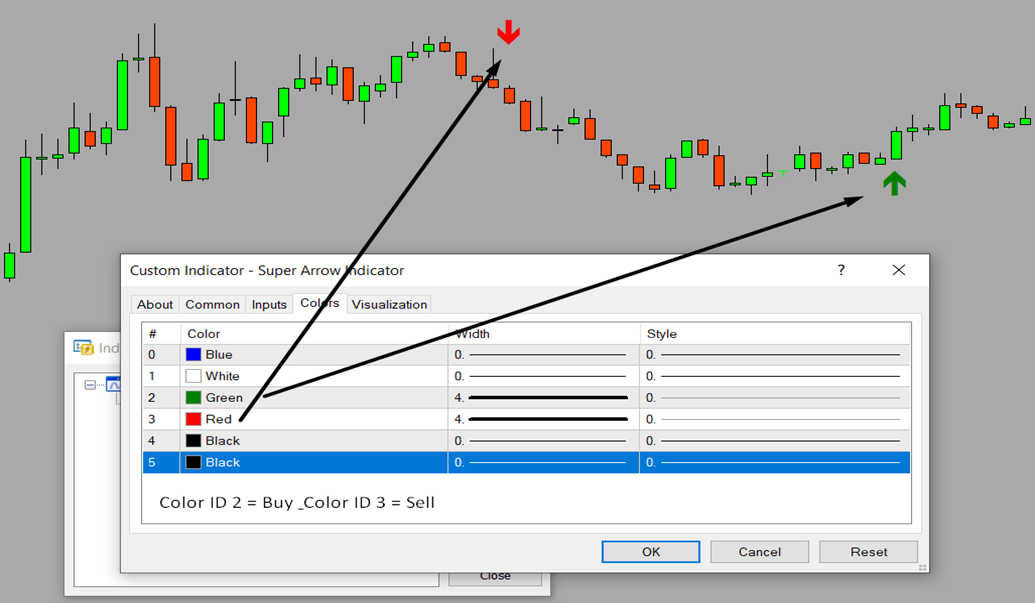
You will notice that the buffer/color ID 2 is for the buy signal and the buffer/color ID 3 is for the sell signal. Make note of these IDs as we need them in the next step.
Step 5
Now load the Automater EA to the desired crypto chart. We will be using the first set file (i.e. default settings) that includes DCA where new positions are added when price goes against us. Thus, load the first set file.
First, add the indicator name exactly as the indicator file name (without .ex4) under Setting 6.
Example:

If your indicator is located within a sub folder in the Indicators folder, please add the folder path correctly. E.g. if your indicator is located inside Market folder then it should be “Market/Super Arrow Indicator.
Then you need to consider Setting 2 to 6 and 26.
If you want to trade Binance futures instead of spot, then enable it on Setting 2. Then add your Binance API & Secret Key, which you created before under Setting 3 & 4 respectively.
Now you need to map your MT4 crypto pair to Binance pair, if it is not already mapped under setting no. 5 (please read the explanation on this setting given in this document for more information). By default we have added USDBTC, BCHUSD, ETHUSD, LTCUSD and XRPUSD. Then, you need to adjust the MT4 lot size under Setting 26 and Binance lot ratio depending on your balance under Setting 6 (You may read the relevant setting explanations in the latter part of this document).


Then, simply enter the identified buffer/color numbers for buy and sell under setting 6 & 7 respectively as given in the following example.

That’s it! You may leave all other settings as defaults for now. You now can use these settings to run back tests on strategy tester or live test with an MT4 DEMO account or even a real account if you like to trade both MT4 and Binance at once with MT4 real money.
Recognizing Buffer based and Object-based Indicators
Buffer based Indicators
If it is a buffer-based signal, you should be able to change the colors of the signal on the chart (up/down arrow, lines, etc.) by changing the colors from the colors tab of your indicator settings as given below.
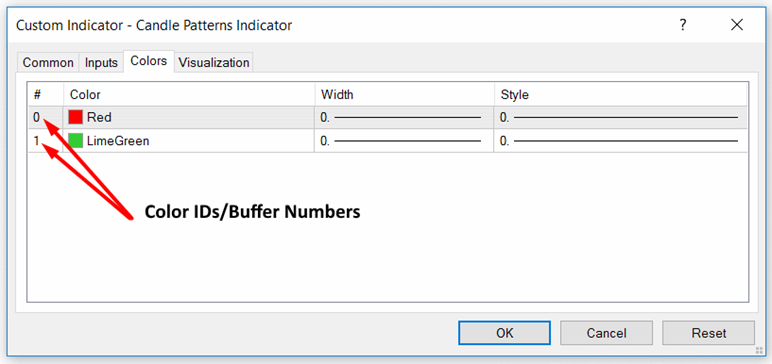
You can simply change the colors and see if the colors on the chart change accordingly. If it does change, then it is a buffer or color ID-based signal. You need to identify the color IDs for buy and sell signals. If your signals are not buffer based, the alternative is to see if the signals generated by the indicator are objects created by the indicator on the chart.
Object-based Indicators
To check if the indicator signals are based on objects, just right click on any part on the chart and see if there is an item called “Objects List” as given below (this item will appear only if there are objects on the chart):
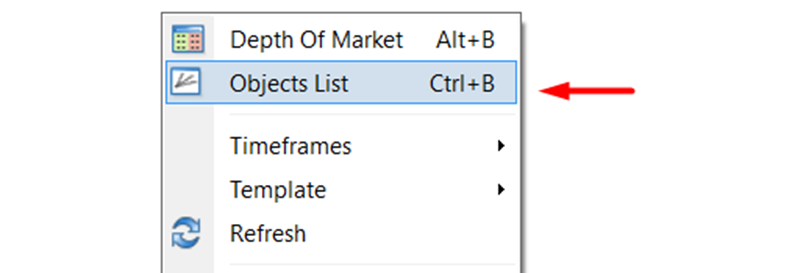
If the arrow, sign or any other pattern generated on the chart are objects you can identify this as opposed to the buffers or colors IDs, then you are going to trade based on these indicator created objects.
Please read the section “Automation based on Objects Created by the Indicator” to see if your indicator-created objects can be automated by our Automater.
Caution on repainting indicators:
The EA may make trades/orders as the indicator buffer or object appears. So if your indicator repaints, you might see trades/orders made while no indicator buffer or object visible or buffer or object is painted at a different place. You may increase the candle ID to look at under Setting 14 (for buffer based indicators) or setting 24 (for object based indicators) to delay the entry to see if the signal repaints.
Automation on the Indicator Buffers/Color IDs
Indicator buffers (or color IDs) are given under the colors tab of indicators. Buffers generally have numbers and corresponding colors. These colors represent some kind of drawing on the chart which can be an arrow signal, trend line, or similar sign.
If your indicator has indicator buffers that signal when to buy and sell, then you can use this option. You just need to enter your indicator name & map the right buffer numbers to buy and sell signals. Our EA will access the indicator in the background and there is no need for the indicator to be running on the chart.
NB: When you use buffers or color IDs, the EA will only consider the default settings of the indicator. You can only change the default settings if you have the source file in mq4 format (You need to open the .mq4 source file on MQL editor and change the default settings to what you need and save the file).
NB: The EA may not work with some default MT4 indicators for buffer based automations (this is because MT4 may not show the indicator files for some of the default indicators) but any indicator would work for object based automations as EA will simply read the object on the chart. However, you can find custom indicator files for the same MT4 indicators on the internet and then use with the Automater.
There are 03 types of indicators you can automate with buffers/color IDs:
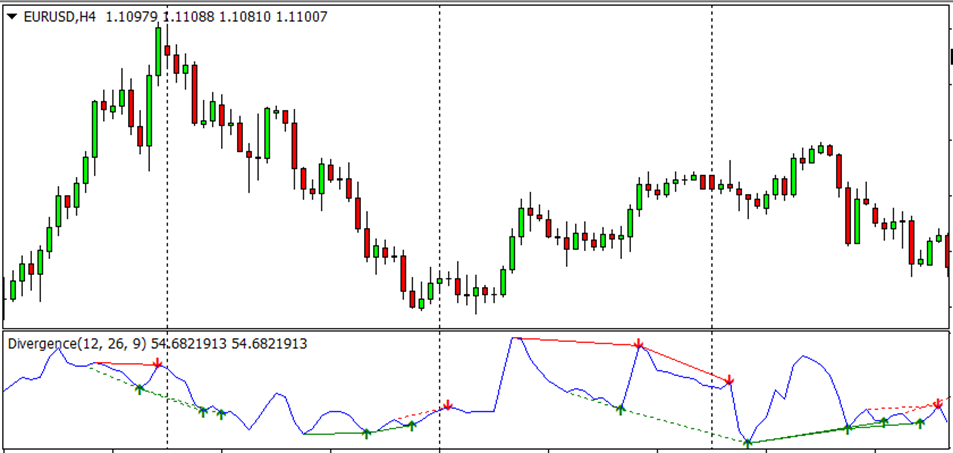
Type 1 – Indicators generating arrows or similar signs such as thumb up/down, dots, etc. for buying and selling.
Examples for Type 1:
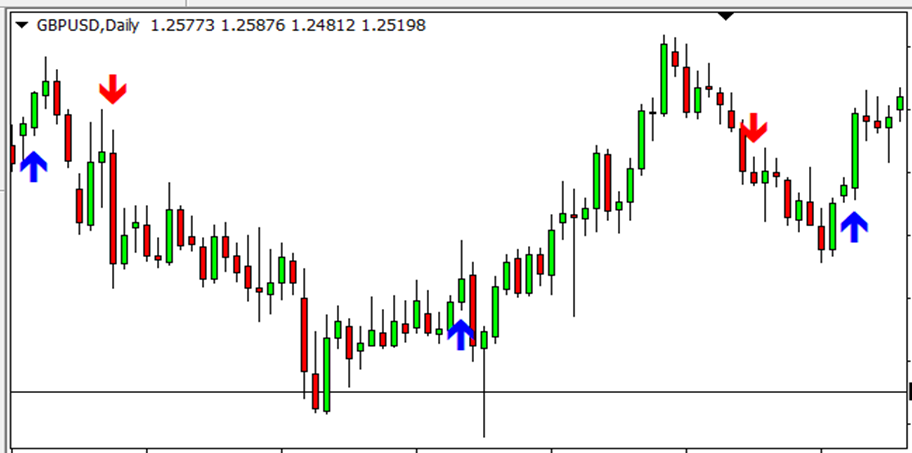
The signals can be on a sub-window as well.
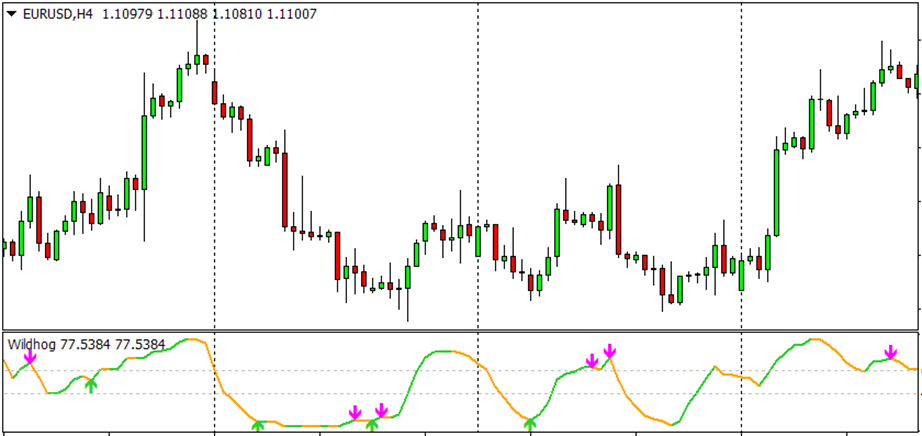
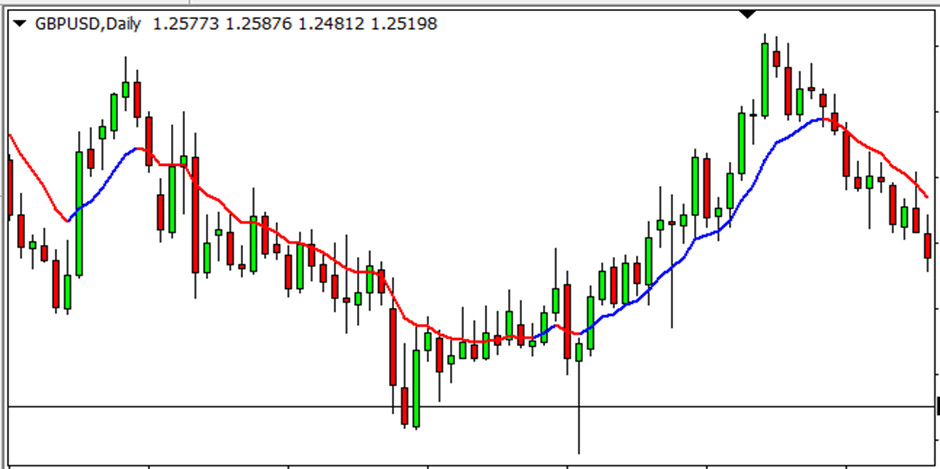
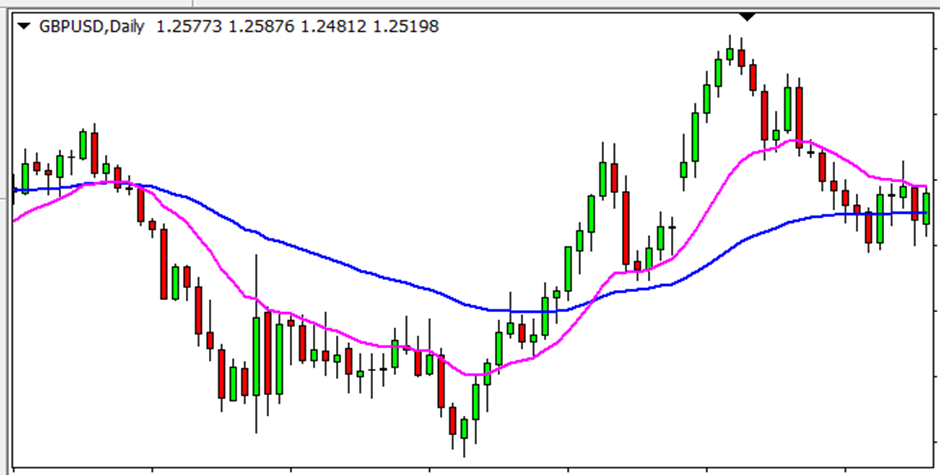
Type 2 – Indicators with one line that change colors as per up or downtrend.
Examples for Type 2:
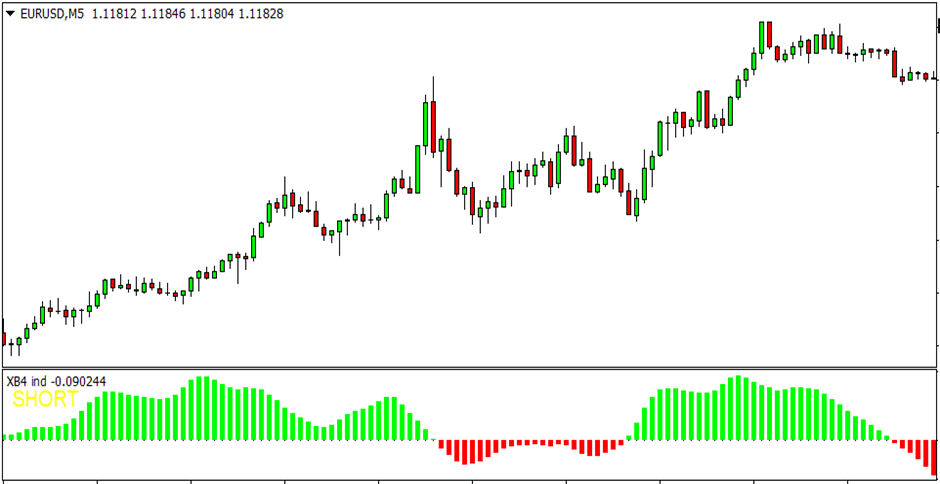
The indicator may also be in a sub-window as follows:
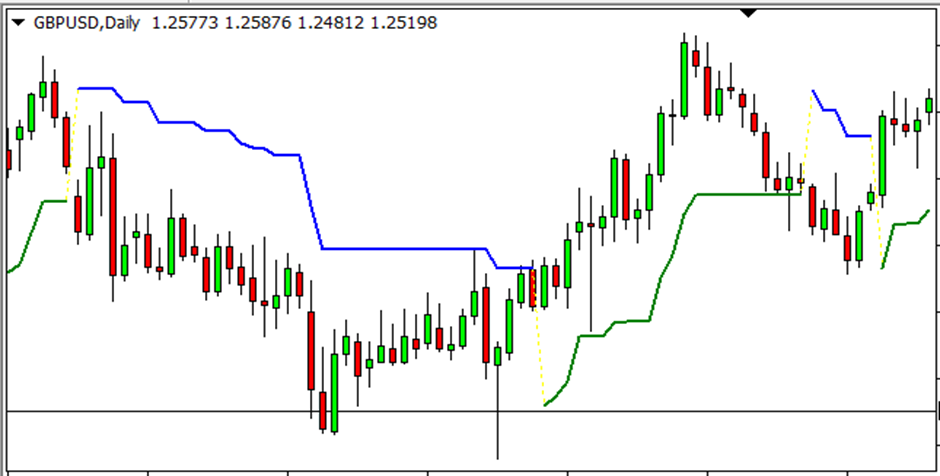
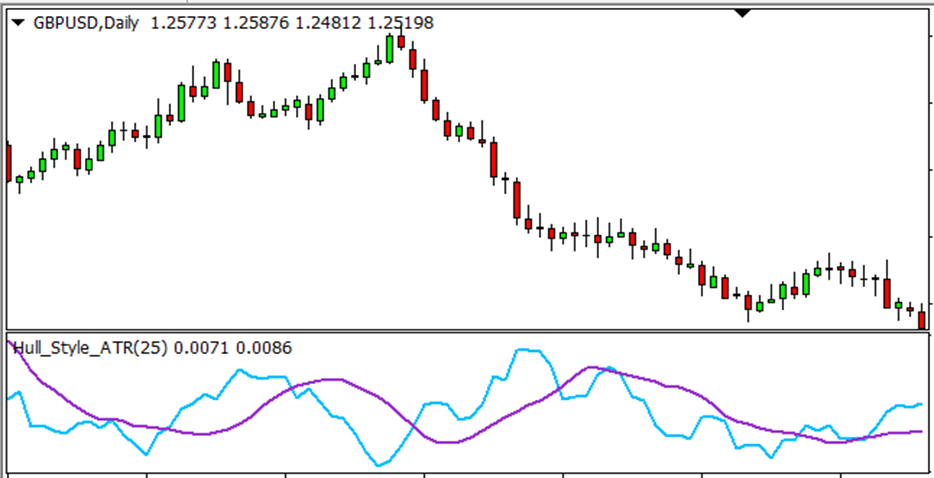
Type 3 – Indicators with two lines where buy or sell is determined by the cross over.
Examples for Type 3:
The indicator may also be in a sub-window as follows:
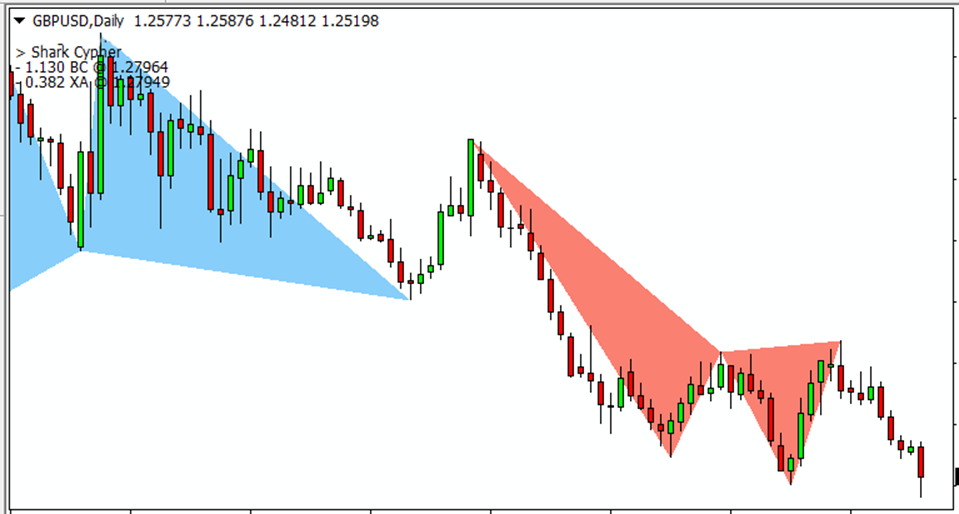
Automation on Objects Created by the Indicator
This is the Type 4 of indicators that can be automated. These indicators generate objects on the chart as their buy or sell signals. This EA will work with almost any object that:
- has a time parameter under properties
- has a common prefix for buy and sell in the object name with different colors for buy & sell objects, or else distinguishable text for buy and sell objects respectively.
Please read the details under the respective settings (Setting 15-25) for more details on using objects.
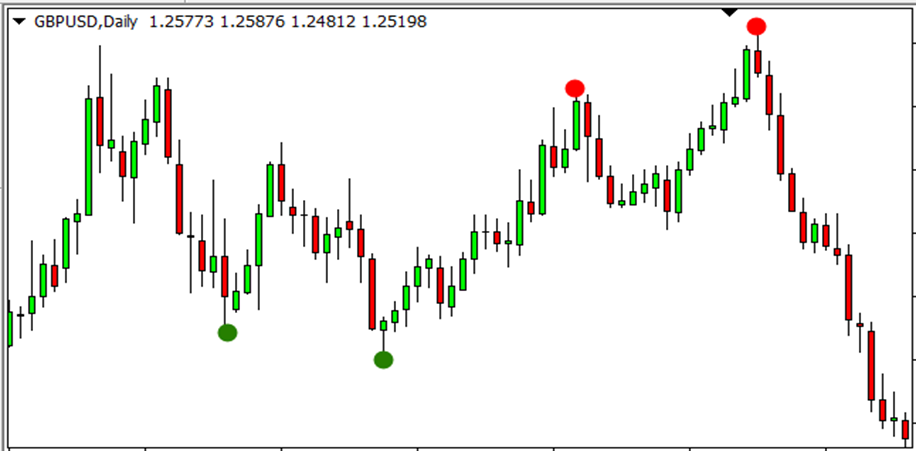
Example of objects created on the chart by an indicator:
Objects can be on a sub-window too
The objects can include arrows, triangles, buttons, dots, etc. You can use these objects to make trades/orders with this EA. The objects are captured based on their name, color, and time of creation.
NB: It is not necessary to add the indicator name under the Setting 1 if you are using indicator objects. Further, you can change your indicator settings without any limitation because the EA is only reading the objects available on the chart. Therefore, you MUST have the indicator running on the chart.